


How to Change Blade on Reciprocating Saw Safely
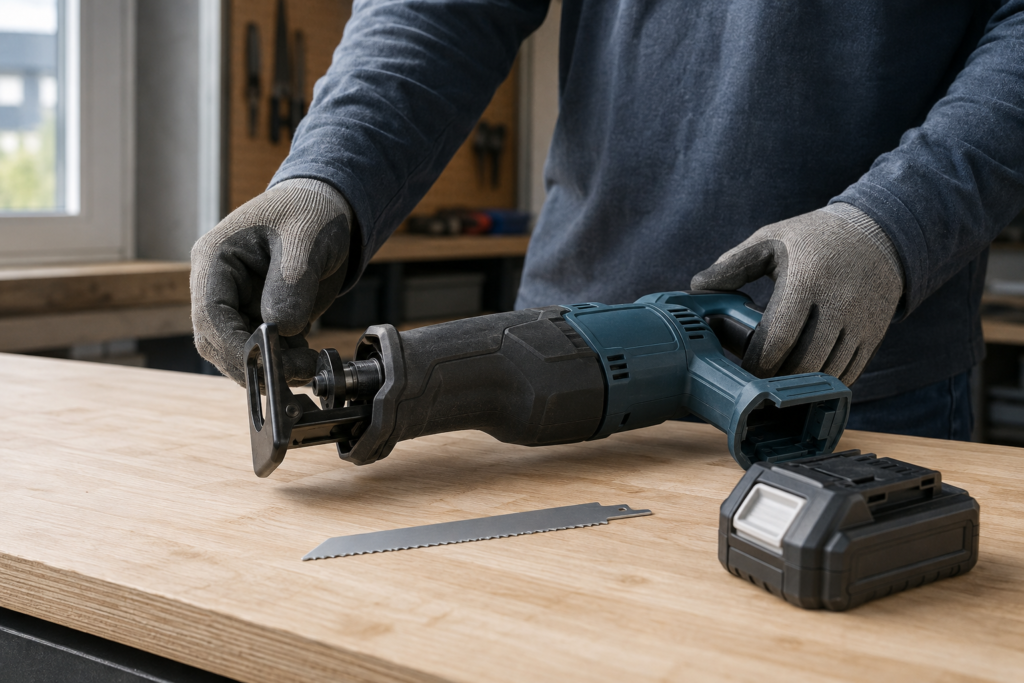
To learn how to change blade on reciprocating saw, isolate the power source first, let the blade cool, follow the exact saw manual to open the clamp, remove the old blade, inspect the holder and replacement shank, insert the new blade fully, and verify retention before restoring power. The sequence is simple, but the release mechanism is not universal. A rotating collar, sliding lever, or tool-assisted clamp may require a different motion.
Do not force a release that does not move as the manual describes. A bent shank, packed debris, damaged clamp, or residual blade heat can turn a routine blade change into a repair issue.
How to change blade on reciprocating saw: prepare first
- Stop and isolate power. Release the trigger, wait for all movement to stop, unplug a corded saw, or remove the battery from a cordless saw. Do not rely on a trigger lock alone.
- Let the blade cool. A blade can remain hot after a metal or demolition cut. Keep hands away until it can be handled safely.
- Wear suitable hand and eye protection. Hold the blade by its body, away from the teeth. Keep the work area clear so an ejected blade cannot strike another person.
- Read the tool manual. Locate the blade-holder section and identify the release control, its direction of travel, and any model-specific warning.
The blade interface is a separate check from the release control. “Reciprocating saw blade” describes a broad family, but the tool manual remains the authority for the holder. The EACHLEAD article on reciprocating blade fit explains why a familiar-looking shank still needs a model check.
Release and remove the old blade
Support the saw so it cannot roll. Keep the nose pointed away from your body. Operate the collar, lever, or fastener exactly as the manual instructs, then draw the blade straight out by its blunt body. Some spring-loaded holders can eject the blade when released, so keep the exit path clear.
| What you see | Safe next action | What not to assume |
|---|---|---|
| Rotating collar | Confirm the specified rotation in the model manual and hold it only as directed. | Collar direction is not universal. |
| Lever or tab | Move it through the stated travel and remove the blade straight. | Extra force will not fix a blocked clamp. |
| Fastener or tool-assisted holder | Use the specified tool and procedure. | A quick-release procedure does not apply. |
After removal, inspect the old blade shank. A bent tang, enlarged hole, heavy scoring, or packed residue can explain poor retention. Look into the holder without inserting a finger. Clean only by the method allowed in the saw manual. If the clamp is cracked, seized, or visibly distorted, stop and service the tool rather than improvising.
Inspect and install the replacement blade
Compare the replacement with the tool requirements before insertion. Check the shank shape, blade length, tooth direction, material, pitch, and application marking. The guide to reading reciprocating blade labels shows how those fields should remain separate.
Open the holder as the manual specifies. Align the shank straight with the slot and insert it to the fully seated position defined by the tool. Allow the locking mechanism to return to its retained position. Do not hammer, twist, grind, or modify the shank to make it enter.
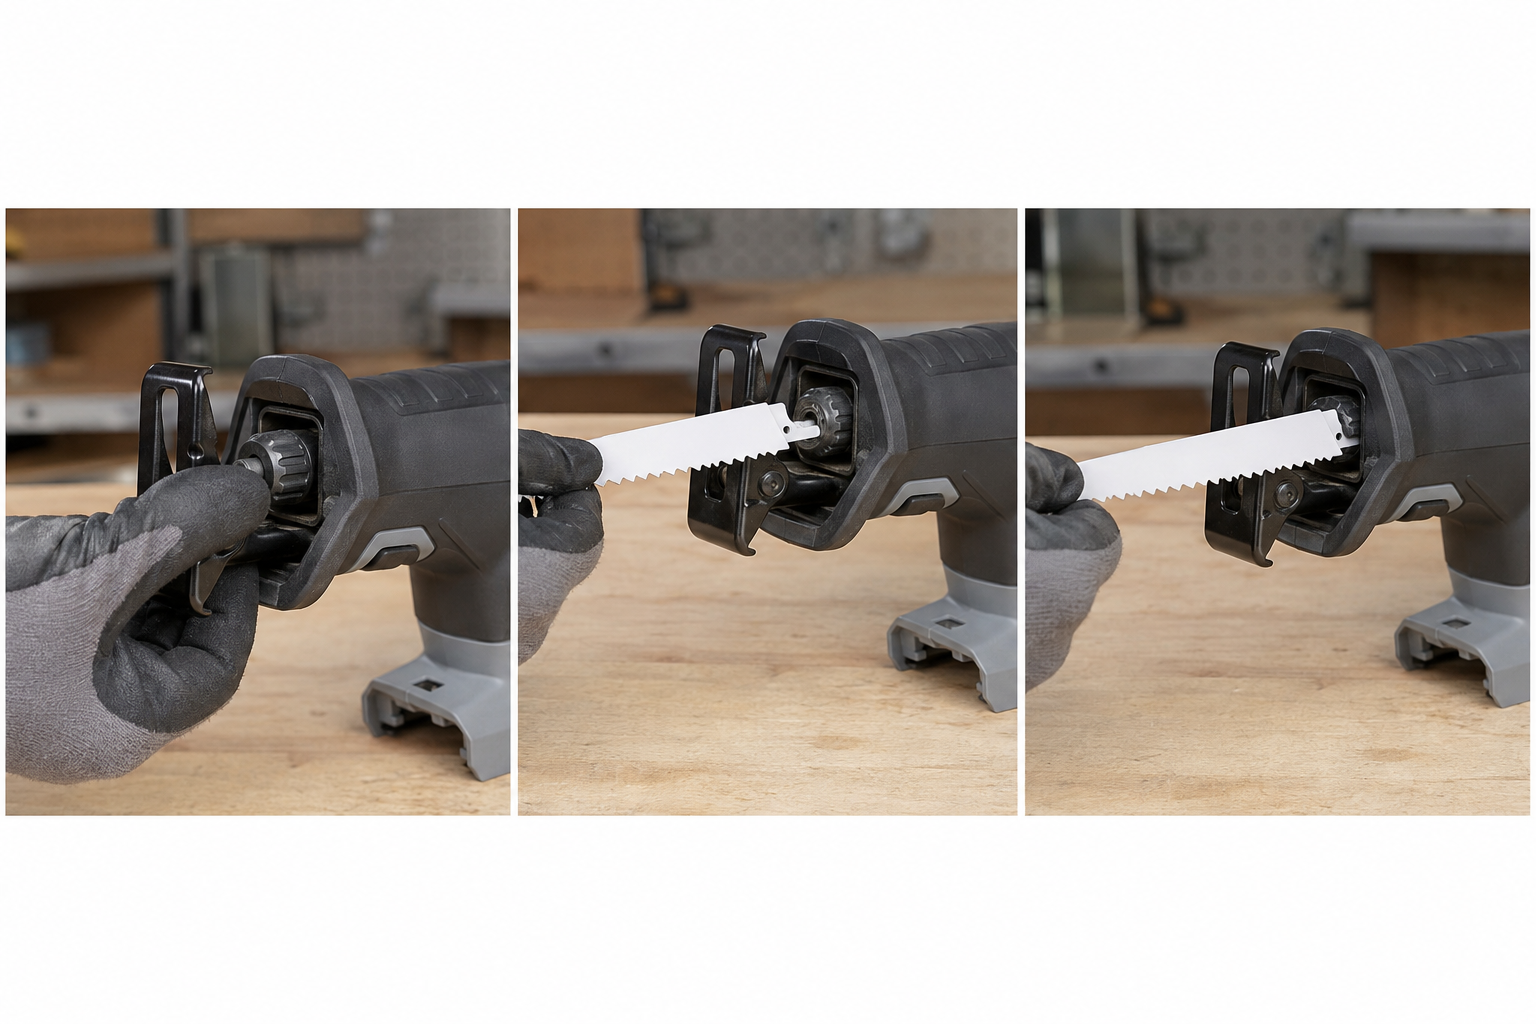
Blade orientation may be selectable on some holders, but that permission must come from the tool manual. It should not be inferred from another saw. Once orientation is confirmed, make sure the teeth face the intended cutting direction and the blade will clear the shoe and workpiece through the full stroke.
Verify retention before restoring power
With the power source still isolated, hold the saw securely and pull the blade body gently in and out. The Bosch LockJaw manual gives this push-pull check to confirm that the clamp pin has engaged the blade. The exact locking feature can differ, but a retention check remains essential.
Confirm that the release control has returned to its normal position, the blade is straight in the holder, and the teeth do not contact the shoe. Restore power only after the hands, loose tools, and removed blade are clear. Start with the blade away from the workpiece and stop immediately if it rattles, shifts, or ejects.
Then match the blade to the job. For metal work, tooth pitch must suit the section; the metal-cutting TPI guide covers that decision. The EACHLEAD reciprocating blade range is a product-family starting point after the holder and application fields are known.
If the blade will not seat or lock
- Re-isolate power and confirm that the replacement shank matches the manual.
- Check whether the release control reached its full open position.
- Inspect for residue, a bent shank, or visible holder damage without probing the clamp by hand.
- Try a known-correct, undamaged blade only if the manual permits that diagnostic.
- Stop if the clamp remains seized or the blade pulls free; arrange qualified service.
A loose blade is not corrected by pushing harder during a cut. The article on reciprocating blade wear covers cut-related symptoms after the blade is correctly installed. Installation problems belong at the holder, shank, and manual level.