


How to Choose Jigsaw Blades for Plywood and Veneer
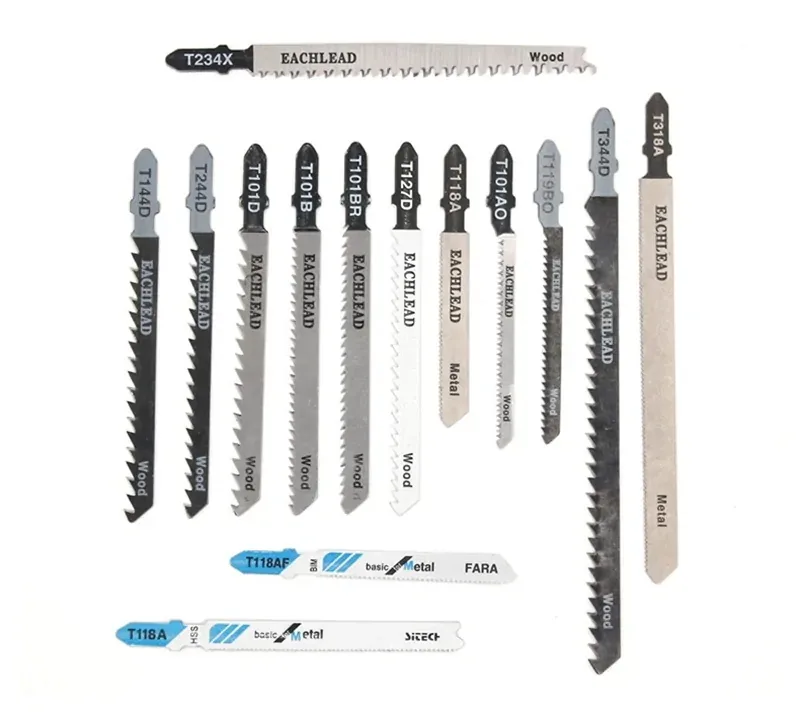

Plywood and veneer-faced panels punish a vague blade choice. The wrong tooth pattern can lift the face veneer, a coarse blade can leave a rough edge, and a blade that does not match the saw can wobble before the cut starts. Choose in this order: identify the panel stack, decide which face must look best, match the tooth geometry to the cut, then confirm shank and length.
This guide is for purchasers, distributors and workshop users who need a defensible starting specification. “Veneer” here means a thin face layer on a panel; it does not prove that every veneer species, adhesive or core will cut identically.
Start with the panel, not the blade pack
Write down four facts before comparing SKUs:
- Panel stack: plywood species, approximate thickness, and whether the core is solid-wood ply, laminated board, MDF-faced board or another construction.
- Best face: face-up work usually prioritizes top-surface appearance; face-down work changes which side receives the upstroke tear-out.
- Cut geometry: straight sizing, a broad curve, a tight radius, a plunge or a cutout.
- Saw interface: T-shank or U-shank, the available blade length, and whether orbital action can be adjusted.
If the core, adhesive, thickness or finish side is unknown, treat the first blade as a sample rather than a guaranteed production answer. A short cut in an offcut is cheaper than a damaged panel.
Match finish and speed to tooth geometry
Teeth per inch (TPI) is a trade-off, not a quality score. Larger gullets and fewer teeth remove waste quickly but leave a rougher edge. Finer teeth generally improve the edge at a slower feed and can generate heat if the operator forces the blade. For a fuller explanation of the label itself, see EACHLEAD’s buyer guide to TPI on jigsaw blades.
| Cutting job | Useful starting point from reviewed guidance | Why it may help | Check before production |
|---|---|---|---|
| Fast sizing of softwood or a non-visible edge | 6–10 TPI wood blade | Larger gullets clear chips and cut faster. | Confirm that the face can accept more chip-out. |
| Broad, gradual curves | 10–12 TPI | Balances steering and edge finish. | Test the actual radius and panel thickness. |
| Plywood or melamine where the face matters | 20 TPI fine blade | WOOD Magazine reports this as a clean-cut starting point for plywood and tight curves. | Use scrap; the article is guidance, not a universal TPI rule. |
| Face-up cut where top splintering is the main risk | Reverse/down-cut or fine-finish profile | Teeth cut on the downstroke and can reduce face splintering. | Confirm the blade is controllable and use the manufacturer’s orbit guidance. |
| Tight curve | Narrow curve-cut blade | A narrower body bends around a smaller radius. | Shorter blades are often easier to steer; verify clearance. |

Tooth finish matters too. Ground, inline teeth are intended to slice more cleanly; milled and side-set teeth create a wider kerf and clear waste quickly but can leave a rougher surface. A reverse-tooth blade can protect the face that is against the shoe, yet its downstroke action may feel different from a standard blade. Keep orbital action low or off when finish quality is the priority, and adjust speed and feed together.
Choose blade material for the panel and workload
High-carbon steel (HCS) is a normal starting material for softer wood and wood-based panels because it is flexible. High-speed steel (HSS) is aimed at harder metals and is not a default plywood choice. Bi-metal (BIM) combines an HCS body with a harder cutting edge and is a reasonable option when a distributor needs one family for mixed wood and harder materials. These material descriptions explain selection logic; they do not promise a particular life, speed or finish for an untested panel.
For a veneered panel, the face is only one layer of the decision. A fine tooth may protect the face while the core produces dust or heat; a reverse-tooth profile may reduce top-side chipping but require slower, steadier handling. Ask for a sample cut using the same face material and core as the order.
Verify shank, length and stability
Modern jigsaws commonly use a T-shaped tang; some older or budget tools use a U-shaped tang secured by a screw. Do not infer compatibility from a brand name or a photograph. Match the shank in the saw manual to the drawing or sample blade.
Blade length also needs a check. WOOD Magazine gives a practical minimum rule of workpiece thickness plus 1 inch so the blade remains in the cut at the top of the stroke. The actual saw shoe, stroke and clearance still control the safe choice. A long blade can flex in thick stock, while a short blade can leave the cut during the stroke. For projects that genuinely require deep reach, use EACHLEAD’s separate guide to choosing a long jigsaw blade for deep cuts rather than assuming a longer blade improves a thin-panel cut.
For a long straight cut, clamp a guide and use a steady feed. If the blade begins to pull sideways, forcing the saw usually worsens the result. A dull blade can burn or tear fibers that a fresh blade handled cleanly; replace it rather than compensating with pressure.
A repeatable selection workflow
- Define the visible-face requirement. Mark “face up” or “face down” on the job sheet and state whether a small amount of post-sanding is acceptable.
- Select geometry. Choose straight, curve, reverse/down-cut or another profile based on the cut, not on a generic “wood” label.
- Set a TPI starting point. Use the table, then test on an offcut of the same thickness and laminate/veneer.
- Confirm the interface and dimensions. Record T-shank/U-shank, overall length, working length and pitch; compare with the saw.
- Tune the saw. Start with a moderate feed, adjust speed to avoid burning and reduce orbital action for a cleaner face. Follow the blade maker’s operating instructions.
- Record the result. Note top and bottom tear-out, edge squareness, heat, steering and blade wear. This record is more useful for repeat orders than a “best blade” ranking.
What to put in a plywood-blade RFQ
Send a supplier these fields so the response can be checked:
- panel type, core and face veneer/laminate;
- thickness range and whether the cut is through one sheet or a stack;
- straight, curve, tight-radius, plunge or cutout geometry;
- face-up/face-down requirement and acceptable edge cleanup;
- saw make/model, shank interface and orbital settings;
- requested overall length, working length, pitch/TPI and tooth direction;
- HCS or BIM preference, finish/coating and packaging format;
- sample quantity, drawing or datasheet request, and the test acceptance points.
Avoid asking for “a blade that fits everything.” That wording hides the variables that determine tear-out and tracking. Ask for one candidate for the stated panel and one alternative if the face or core changes.
A thin-plywood SKU to verify with EACHLEAD

The live EACHLEAD jigsaw blade category is the right place to compare the supplier’s jigsaw families. For a thin-plywood conversation, the T111B Jigsaw Blade for Thin Plywood listing is a concrete model to verify: its current page lists a T-shank interface, HCS 65MN/SK5 material, milled teeth, 100 mm overall length, 75 mm working length and 2.0 mm pitch/12 TPI.
Those values are the page’s model-specific listing, not a promise that T111B fits every saw or every panel. The title supports a thin-plywood pathway only. Before a veneer or thicker-panel order, send the exact face/core, thickness, saw interface and cut test requirement to EACHLEAD and request confirmation or a sample. The listing does not establish a universal veneer qualification, maximum thickness, certification, service life or guaranteed finish.
Quick decision
If the panel is thin plywood and the saw accepts the listed T-shank, start by comparing a fine or reverse-tooth wood blade against a standard wood blade on scrap. If the best face still chips, reduce orbital action, slow the feed, try the appropriate down-cut direction and re-check the blade’s TPI. If the cut wanders, check guide technique, blade length and sharpness before simply choosing more teeth.